
Have you got a corner of your kitchen which is never used and just feels like a part of the room that has no purpose and is hard to furnish. May be you have tried to fill the space with different furnishing ideas over the years such as tub chairs or a small table and compact dining chairs. Or may be the space has just remained totally unloved and unusable.
Well fear not here is an idea that could transform your under utilised kitchen area into a welcoming and functional place for family and friends. The key to this project is ditching the space consuming furniture and in its place building a practical banquette type seating area that not only allows for comfy seating arrangements but gives you loads of really useful storage to let you hide away all that “stuff” that you don’t have a home for but need really easy access.
Banquette seating design
The first part of the process was to decide how high to make the seat part of the bench so that it formed a practical balance between tall grown ups and the smallest little people. For our purpose the height chosen was 450mm which would then allow a few millimetres for a soft cushion. The height of the back of the bench was set at 1450mm from the floor. Allowing for the width of the radiator on the wall behind the right hand bench seat back and a 5 degree angle for the seat back this gives us a seat width of 400mm.
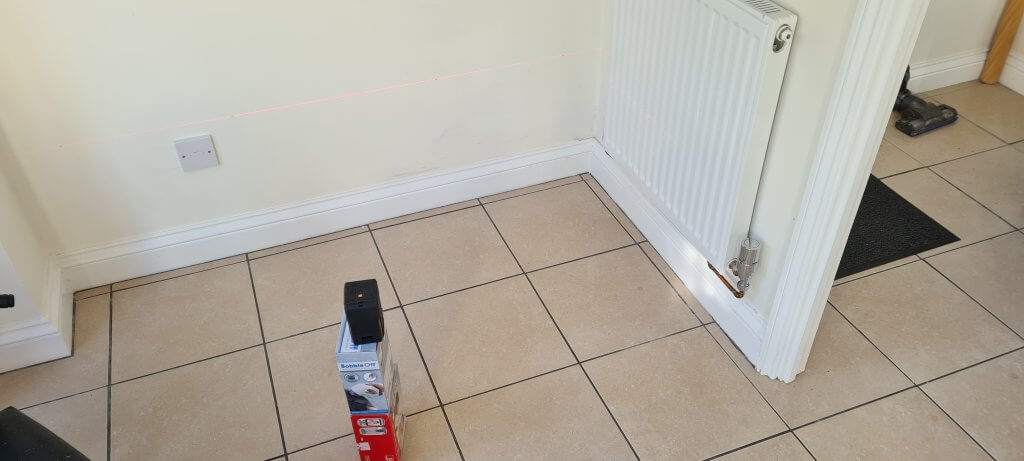
In order to maximise the space the old double panel radiator which protruded out 165mm from the wall was replaced with a thinner but slightly taller one which only protruded 70mm which allowed the seat back to be specified with a thinner profile. Now that the seat height, protrusion and seat back profile had been set out it was time to start preparation for the framing.

Framing
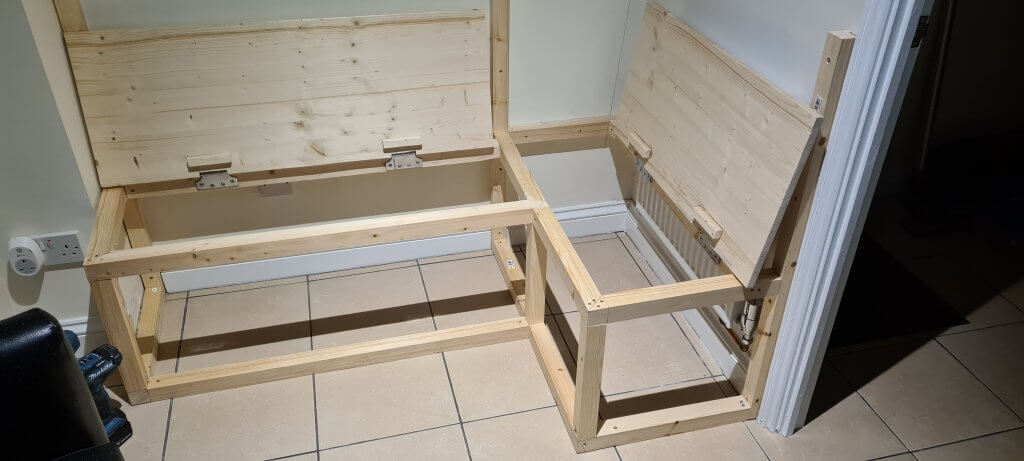
44mm square planed square edge timber (PSE) was selected for the framing and a pack of 6 x 2.4 metre lengths was purchased from the local big box store. Three full height wall studs were positioned at the corners of the bench with the skirting board being removed with a multitool and a plunge cutter blade. The studs were fixed to the wall with metal self screw plasterboard fixings and pozidrive screws. Then the sole plate timbers that sit on the floor were cut to the correct length and butt jointed to the studs using double threaded self drilling framing screws but making the screw insertion easier by clamping the joint and drilling a 3.5mm pilot hole first before driving the screw home.
The uprights were then cut to size (a sliding mitre saw was used on all the framing to produce square joint faces) taking into account the 44mm of the horizontal stud that will be placed on top that will make up the height of the seat plus the seat lid itself. The uprights were glued and screwed into place with the horizontal studs being cut and fixed in the same fashion except that they were mitred jointed so that both horizontal studs when they met at the corner could be screwed through the top for extra structure.
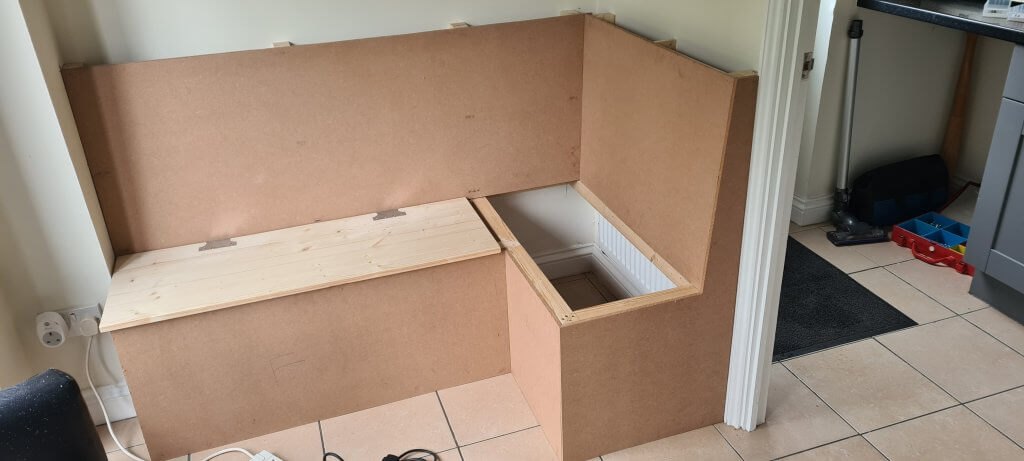
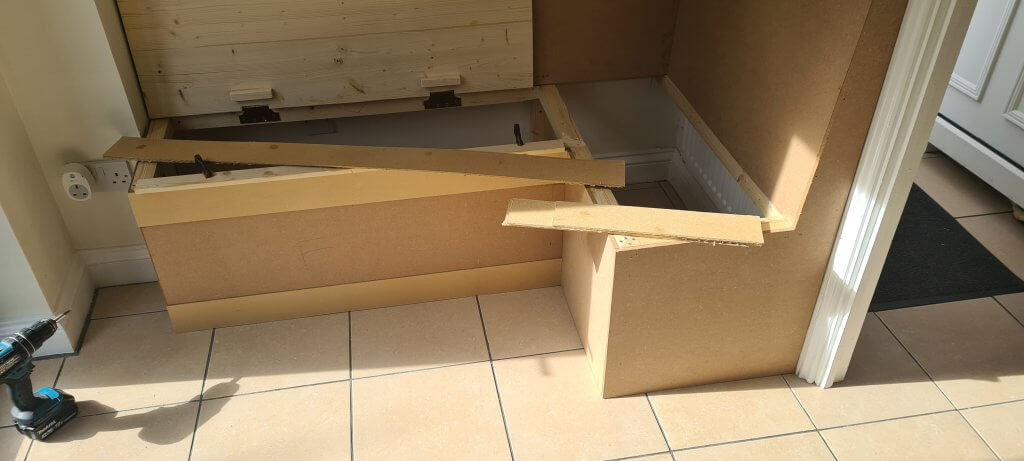
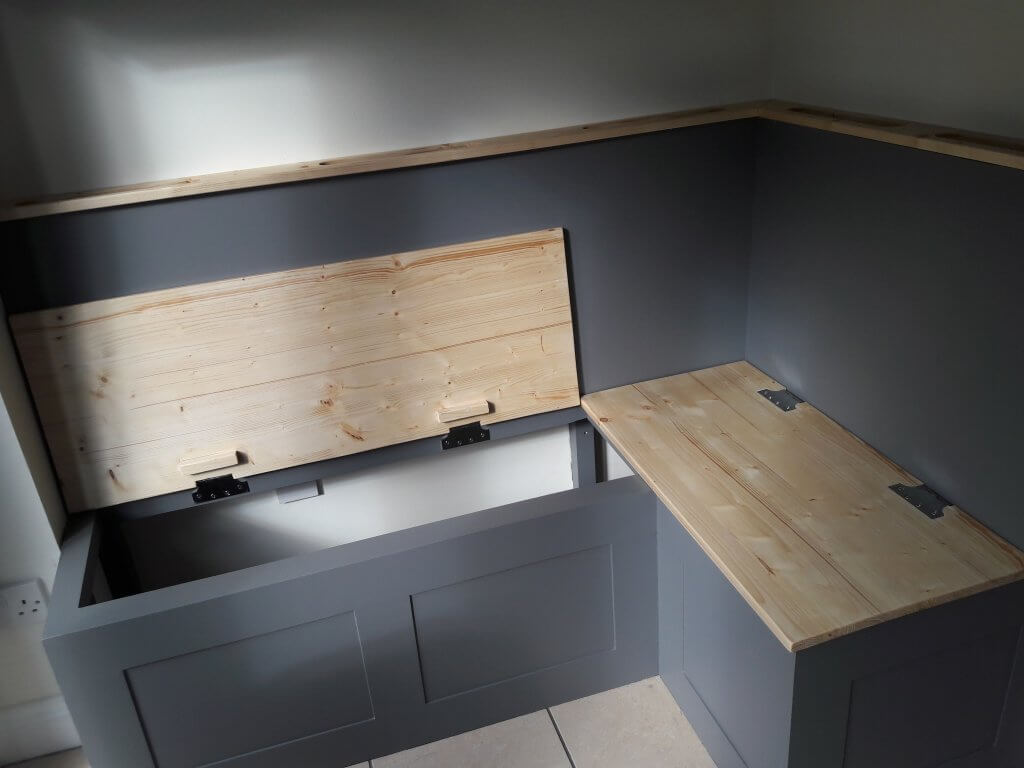
Seat lid tops and parliament hinges
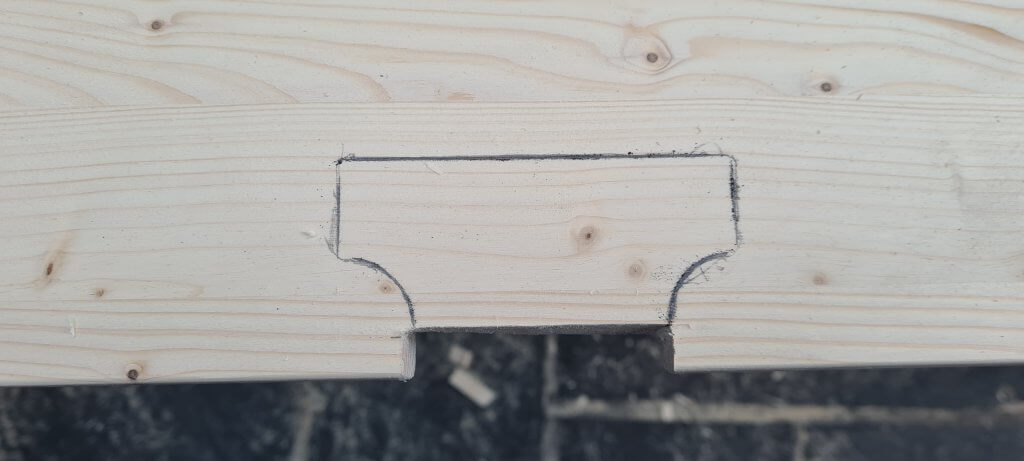
With the frame carcass of the seat complete it was time to start making the banquette seat lid tops. Bevelled 18mm thick, Knotty Pine board was selected. Because the hinges could not be attached to the edge of the board being only 18mm wide parliament hinges were chosen which would allow the lid to be set flush against the seat back board. The boards were cut to the correct size allowing for an overhang of the seat carcass including the thickness of the panels and decorative battens which would be applied later. Then the position of the hinges was marked and a rebate was cut into the board to let-in the hinge and allow for the knuckle of the hinge to be flush with the edge of the board. The hinge was then offered up into the rebate and drawn around.
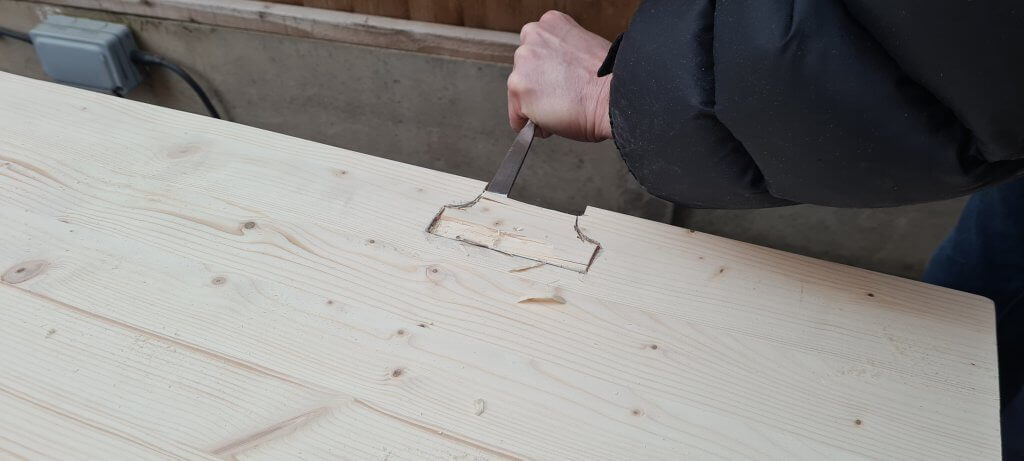
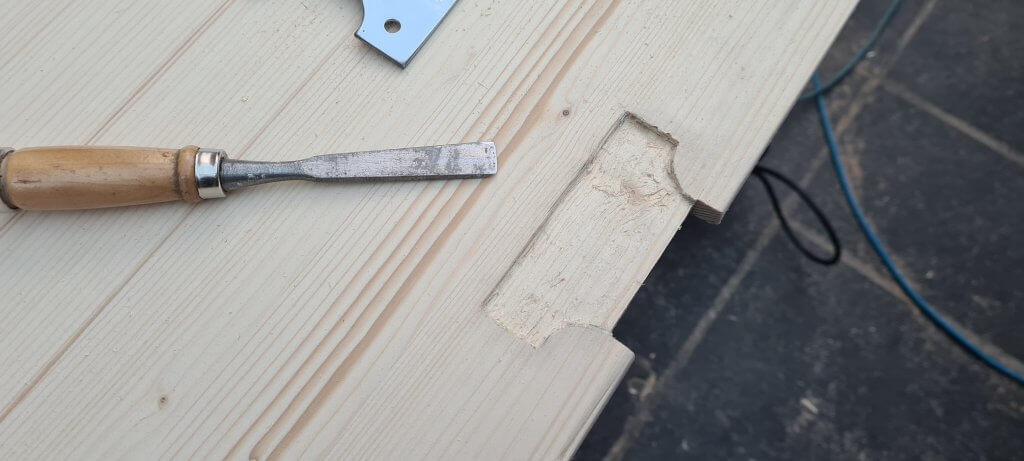
A sharp chisel was used first to cut around the pencil outline of the hinge and then to chop out the housing upto the outline making sure to keep offering up the hinge until it lay flat in the housing and flush with the top of the pine seat board. When the hinge housings were fully prepared the pilot holes were drilled and the hinges screwed into place on the seat boards.
Then the boards were offered up on the bench carcass and using clamps and bits of timber offcut to hold them in the right position the hinge screw positions were marked onto the horizontal studs and the pilot holes drilled and the hinges screwed into place. The seat lids were checked to make sure they didn’t bind when being opened and closed. The seat lids were then removed and the edges were sanded smooth and a bevel put on the cut edges and then treated with two coats of Danish Oil and then screwed back in position.
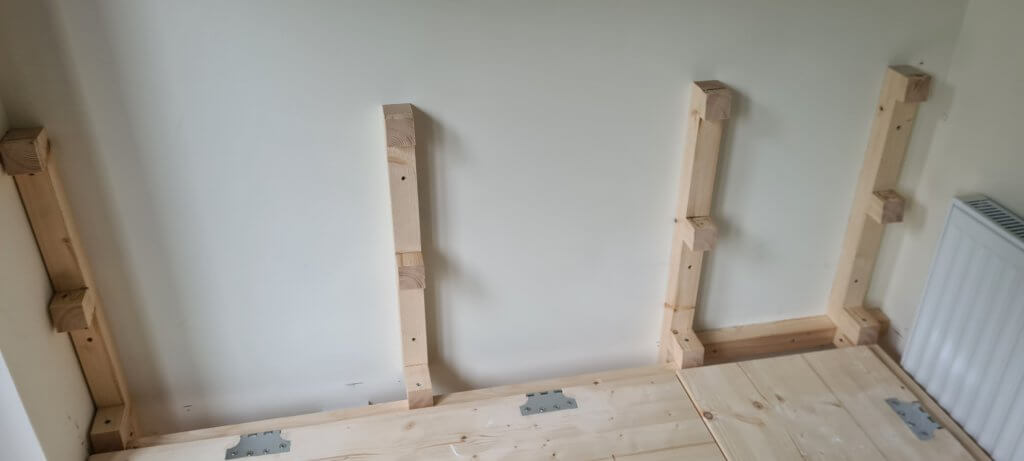
Seat backs and rake angle
Attention was now turned to the seat backs. Two extra studs were screwed to the wall for the longest seat and then the angles were calculated for the back panel making sure that the seat lid would not bind on the panel. The laser level, switch to the laser on the lock position, was used to mark the five degree rake angle on the wall and the spacers length and cut angle marked accordingly. Then the spacers were cut using the sliding mitre saw. The spacers were then glued to the studs using two part mitre adhesive which uses a liquid glue on one part and the spray activator on the other forming a super strength bond for the spacers. An extra stud was screwed to the wall on the right hand smaller seat side on the left of the radiator and spacers applied to the studs in the same way as was done for the larger seat back.
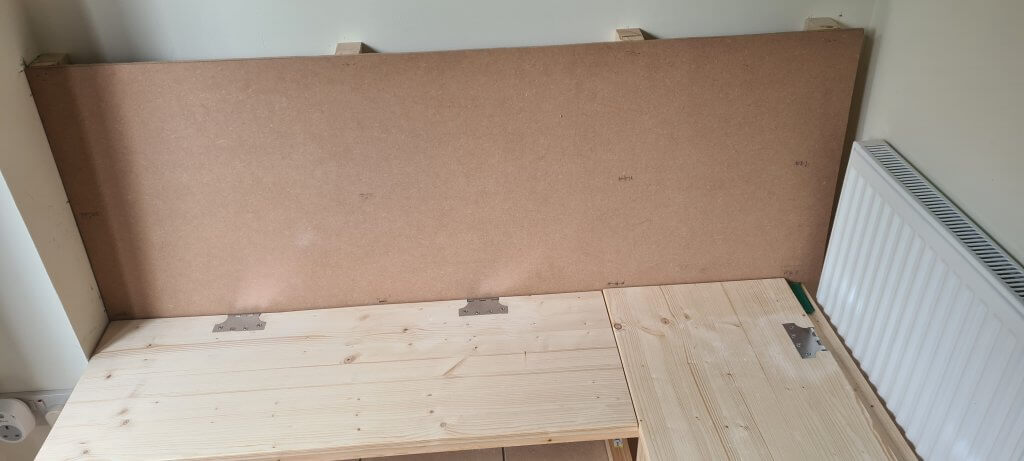
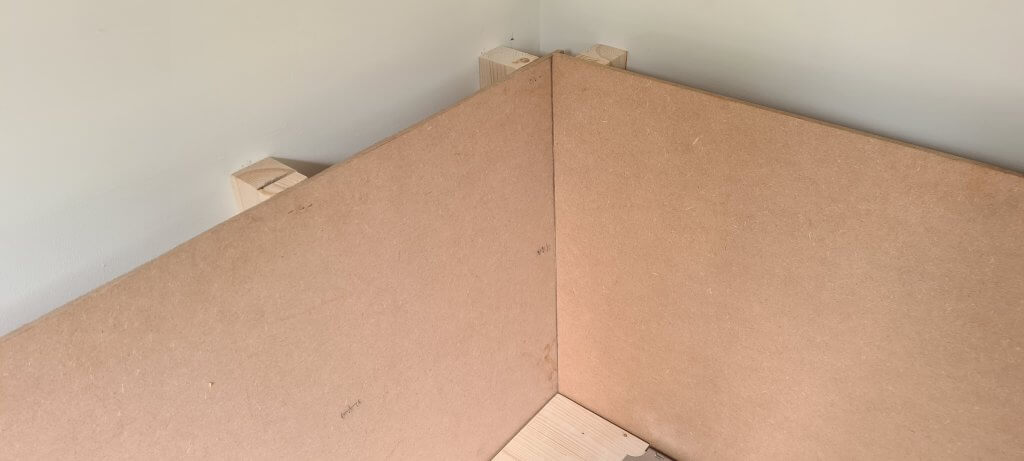
To form the seat back, for the longest part of the banquette seat, 10mm thick hardboard sheet was used and cut to size so that it went from the top seat rails to level with the top of the vertical wall studs. It didn’t need to butt up to the wall on the right-hand side as it would be covered by the seat back for the shorter part of the banquette seat. The hardboard was fixed into position with an electronic nail / tac gun using 18mm pins.
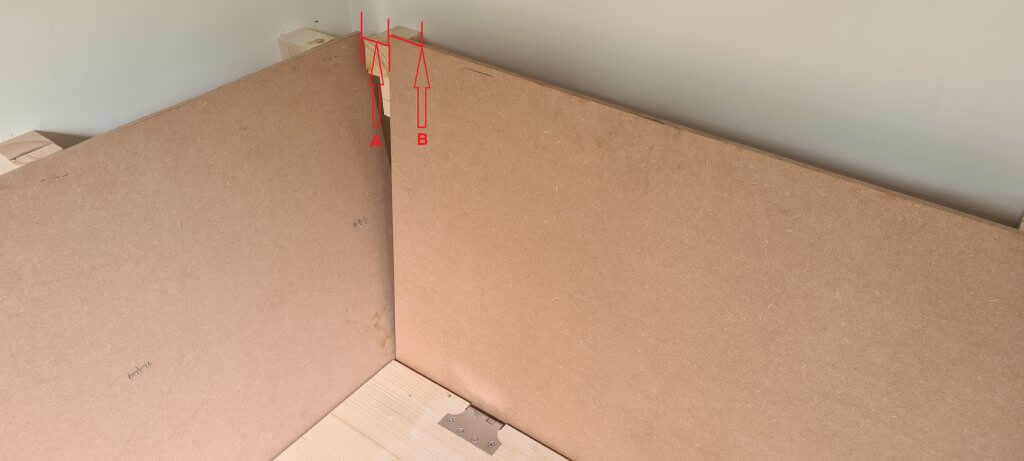
The smaller right hand bench seat back was then cut to the right height and roughly the right length allowing 60mm for the angled cut to be made allowing the smaller board to butt up to the larger one. In order to calculate the cut angle the board was offered up so that the bottom of the board was touching the bottom of the larger board and leaning against the stud spacers to give the correct rake angle. The gap was then measured in “A” and applied to the board “B” in the picture above and then a line from “B” down to the corner of the board was marked and the board cut down on that line.
The smaller board was then offered up and the top edge marked so that it was a the same height as the other backboard and then cut down to size. Once cut to the correct height it was then pinned into position with the tac gun.
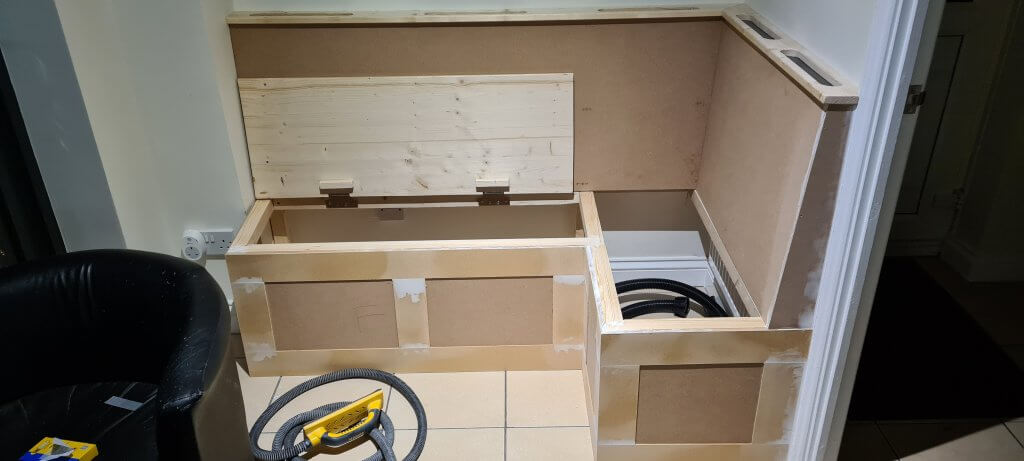
Panelling the bench seat carcass with hardboard
The carcass of the banquette seating was then covered with the 10mm hardboard panelling. The hardboard cut to size and glued to the carcass studs using the two part mitre glue with the liquid part being applied to the panelling and the activator being sprayed onto the stud work and then the panelling pressed into place. The two part mitre glue sets in a matter of seconds and makes a very strong joint.
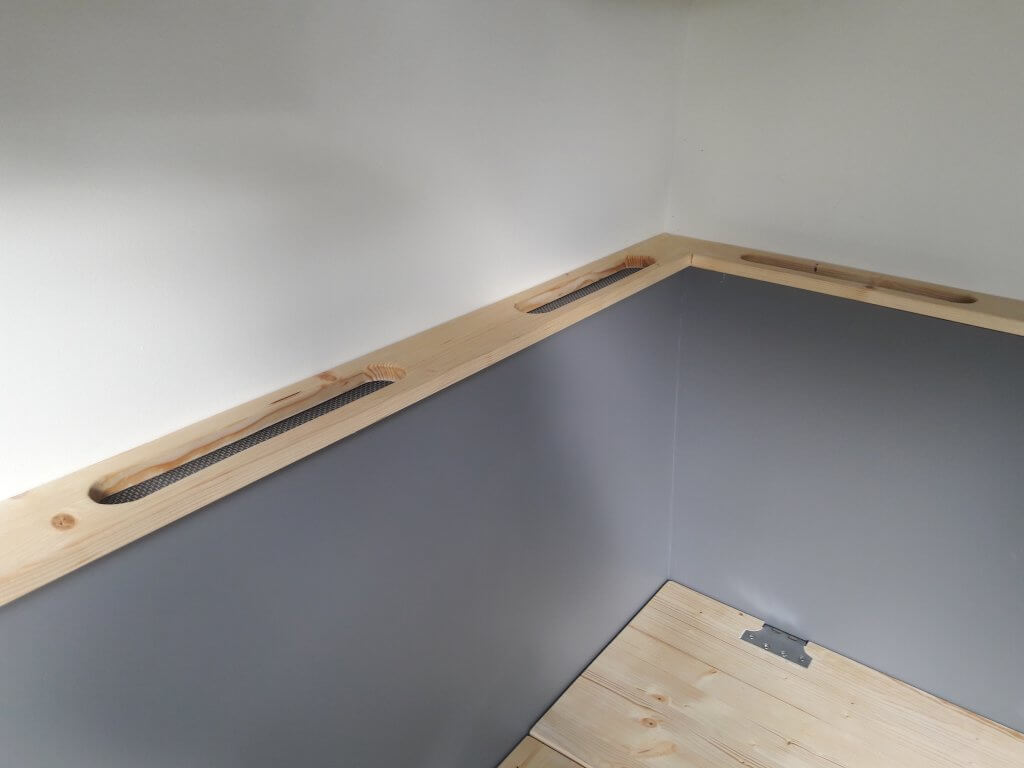
Seat back top covers with mesh air-vents
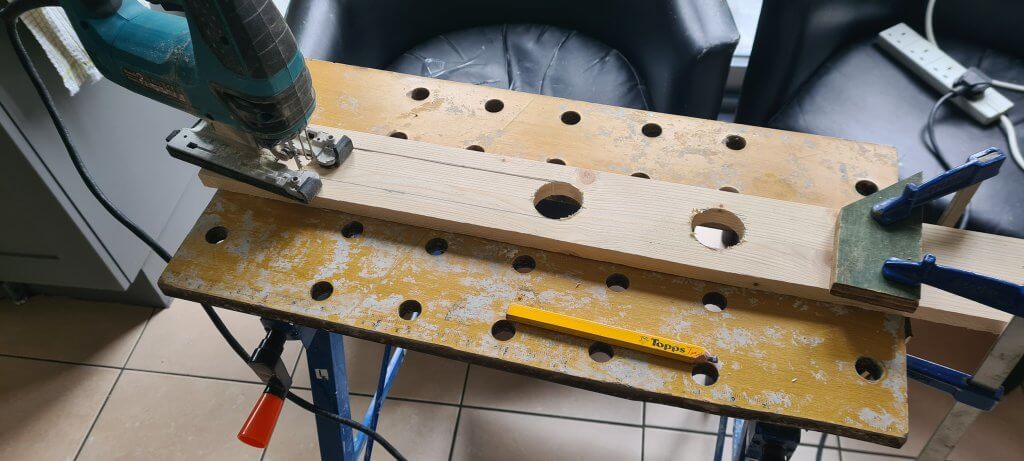
The next job on the list was to prepare the seat back top cover battens from planks of Knotty Pine cut to a width of 88mm to allow a slight overhang. A bevel was applied to the front and side edges of the battens. A mitre joint was used to join the battens in the corner of the seat. Because the bench seat covers a radiator this required air vent slots to be cut in the top cover battens to allow the hot air to escape out. Hole cutters were used at either end of the slot and then the timber in between was removed with a jigsaw.
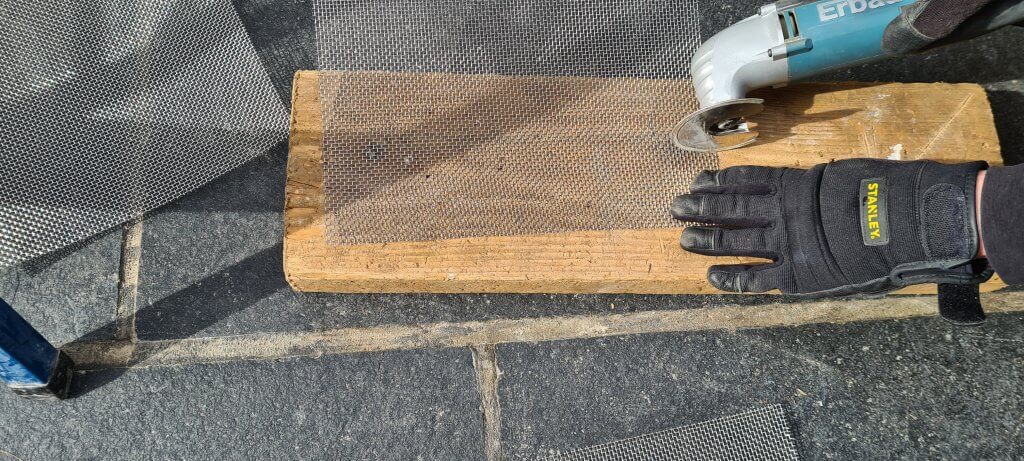
Once the air vent holes had been cut out the edges were then given a beveled finish using sandpaper and were then ready for the wire mesh to be applied to the underneath. The fine stainless steel 8 mesh with a hole size of about 5mm was cut down to size with a multitool using a diamond edged segmented blade.
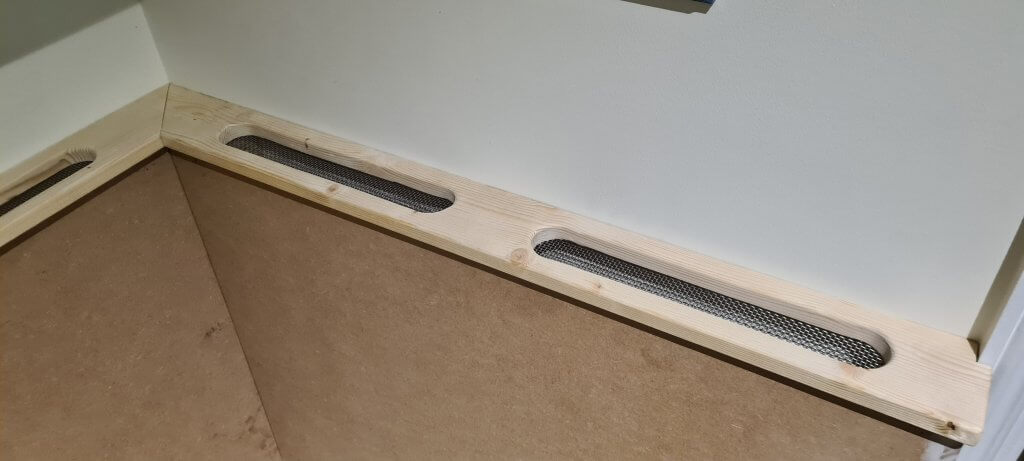
Once the stainless steel mesh had been cut to size it was offered up into position and tacked into place using the electronic tac gun. The mesh allows the hot air from the radiator inside the bench to be vented through the air holes while preventing any small objects from falling down the back of the seat.
Decorative battening
Now it was time to apply the decorative battening to the hardboard to finish off the look. Strips of 3mm thick hardboard cut to a width measuring 93mm were fixed using mitre glue with the liquid part of the glue being run around the edge of the batten and the activator being applied to the hardboard panels that the battens were being fixed to. The battens were then pressed into position on the hardboard.
Once the decorative battening had been fixed into position any small gaps in the the joints were filled with a quick dry fine grain filler. When the filler had dried it was sanded down with a hand sander fitted with a 180 grit paper and a hoover extraction unit to keep the dust down to minimum.

Paint preparation, priming and kitchen cupboard paint top coat
With the bench prepared for finishing it was now time to get painting. The floor was masked up to prevent any paint getting on the tiles. The bare wood was first primed with a special MDF primer that serves two purposes. First purpose to seal the surface of the wood and hardboard to enable the top coat to adhere properly and to get good coverage and secondly to fill the grain of the wood and hardboard and cover up any minor imperfections.
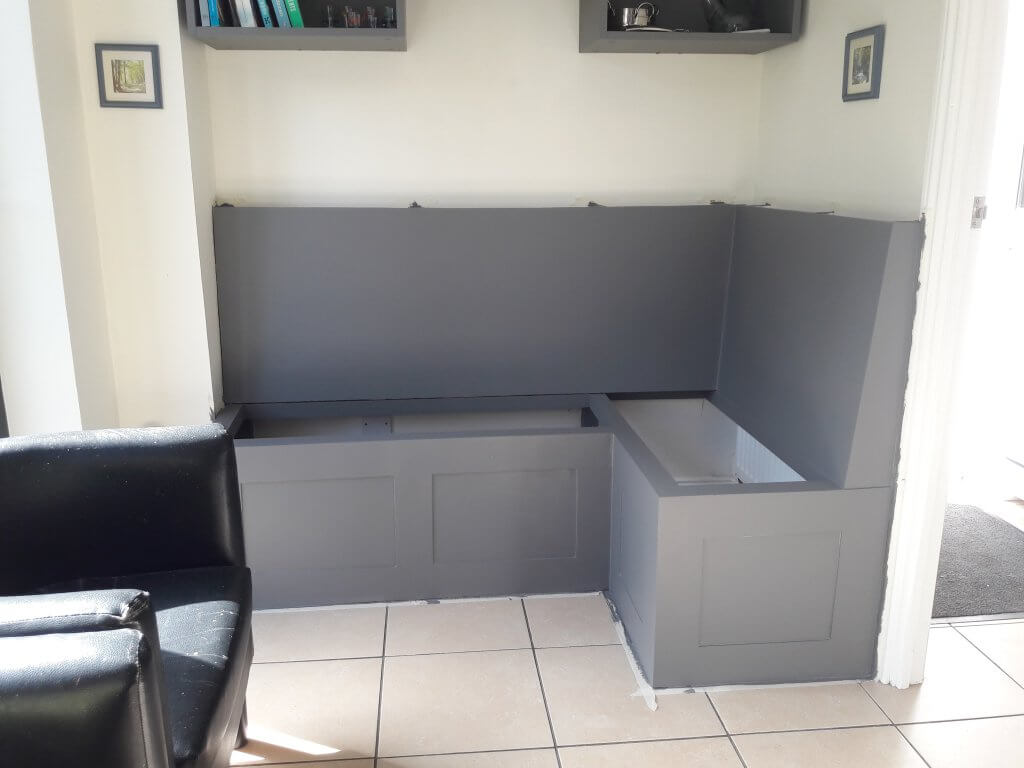
Finally the top coat was applied to the bench using a kitchen cupboard paint with anti-scuff and stain resisting properties. The paint was rollered on with a rag roller and a small brush was used to get into the hard to access areas of the bench seat.
The finishing touch is replacing the seat lids and fixing the seat top cover battens in place over the seat back. Now it’s just a case of making a cup of coffee and enjoying it on your new bench storage seat while contemplating what to put in it!