
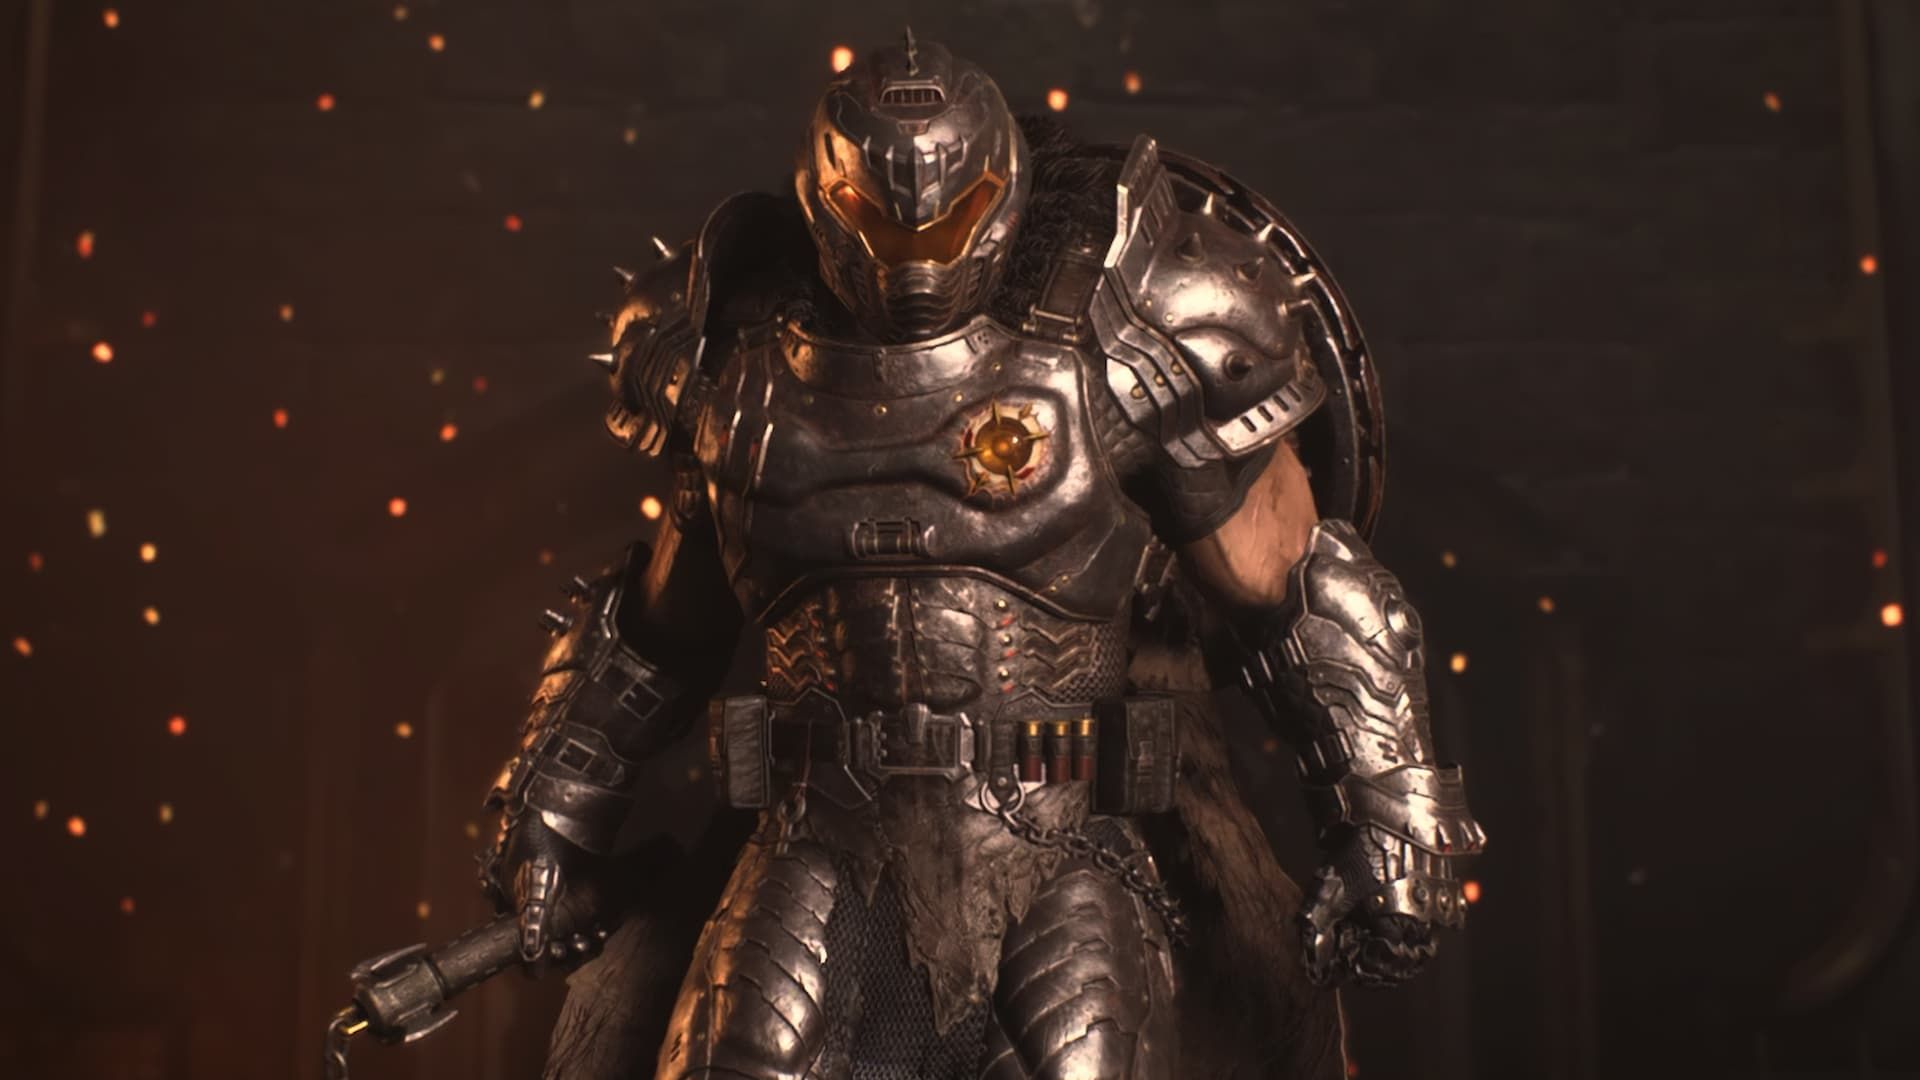
Doom: The Dark Ages is filled with Secrets, consisting of unlockable items and materials needed for upgrading weapons.
Some are sat right out in the open, while others involve a bit of searching and puzzle solving on the player’s part.
Related
Doom: The Dark Ages Review
Doom: The Dark Ages takes the series in a new direction, with its medieval theme tying into its more defensive and destructive playstyle.
The more frustrating Secrets involve the Dragon stages, which have massive areas to search for, unnecessarily dragging out the runtime.
Those struggling to find every Secret in each level in Doom: The Dark Ages can find them detailed in this DualShockers guide below.
Not all chapters in Doom: The Dark Ages have Secrets, such as the ones focused on the Titan. Chapter 3 – Barrier Core, Chapter 13 – From Beyond, and Chapter 21 – Final Battle lack any Secrets and won’t be discussed below.
Chapter 1 – Village Of Khalim
Chapter 1 has 6 Secrets to find. As this is the opening stage of the game, they’re all fairly easy to nab.
- Life Sigil – Bash through the wall and you’ll find the Life Sigil in the corridor beyond.
- Toy – Once you get the Blue Key, go back to the door nearby to find the Imp Toy.
- Weapon Skin – Use the blue jump pad to cross to the other side, then turn around and run/jump to the open cave in the cliff.
- Toy – Drop off the cliff edge and go around the ledge to find the Soldier Toy.
- Life Sigil – Once you get the Secret Key (it’s hard to miss) you can unlock this door and get the Life Sigil.
- Codex – Near the end of the stage, there’s a path to the right. You can find it there.
Chapter 2 – Hebeth
Chapter 2 has 9 Secrets to find. The first few are easy, while the last one is frustrating, due to how it involves something that’s not well sign-posted.
- Toy – Drop down the shaft to find the Imp Stalker toy.
- Life Sigil – Look for the door with the blue circle on it – this can be shield-bashed.
- Gold – The gold is easy enough to find in this room.
- Gold – Look for the door with a blue circle
- Gold – Look for the blue circle on the grate
- Gold – Kill all the enemies in this area to open the door that leads to the gold.
- Life Sigil – This is a tricky one, as it’s not obvious how to get past the wall of flame. Go up to the fire, turn around, and you should spot a breakable red shield spot in the area above. Smash it, then go around to climb the ramp and jump into the hole left behind. You’ll fall into an area with a pressure wheel. Spin it to turn the fire off and enter the next area.
- Weapon Skin – Look for the stack of three crates. There’s a climbing wall bit above them. This leads to the ventilation shaft with gold and a weapon skin.
- Chest – Go through the hole in the wall and follow the path to find the gold.
Chapter 4 – Sentinel Barracks
Chapter 4 has 6 Secrets to find.
- Toy – Look for the blue shield bash wooden wall. You’ll fall into an area with a Hell Knight toy and gold.
- Chest – You’ll see it on the ledge before you can grab. Continue around and go to the left corridor, where you’ll see a green shield point that lets you zip up. You can drop into a new area with a crate that can be shield bashed. This pushes the crate next to the ledge and you can jump up to get the chest.
- Life Sigil – Look for a door with a little button pad that can be interacted with. It will open, leading to a path where some demons will fly out and attack you. You can then go up and get the gold.
- Life Sigil – You’ll spot a Life Sigil behind some wood. Go past this area and you’ll see that you can jump over the ledge to a platform on the left, which leads to the Life Sigil and an area where you can bash down the door.
- Gold – Drop down onto the broken bridge, turn around, and jump into the area with the fireballs and try and dodge them while fighting enemies. You’ll find a path leading to a cache of gold.
- Weapon Skin – Very easy to find. Just continue through the level, and you’ll find the spiral staircase with gold and a weapon skin on it.
Chapter 5 – The Holy City Of Aratum
Chapter 5 has 9 Secrets to find.
- Gold – After destroying a helicarrier and landing, you’ll come to a small town. Drop down the hole in the ground shown on the map to land in an area filled with gold and other loot.
- Gold – Get the Blue Key and go to this door to find some gold. The Blue Key is very easy to find, sitting on a cliff in the graveyard on the same island.
- Gold – Go to the tower shown on the map and kill the creature while on dragonback. This will open a new landing point, where you go down and fight monsters. Once defeated, you’ll be able to access a cache of gold.
- Toy – Drop down the ledge to where the gold is. Kill the monsters and follow the path around to find the Serrat toy.
- Ruby – It’s behind a locked door. Find the green switch and look up – there’s a breakable red lock that you can break with the shield. This drops a stone onto the switch, keeping the door open and letting you nab a Ruby.
- Gold – Outside the building are two wooden platforms. From the entrance, go around to the right-hand side, break the red chain, and shield bash the crate over to the other side. You can now jump on the left platform near the entrance and access a cache of gold.
- Chest – Keep going through the level, and you’ll come to a blue shield bash point, where you can find an area with a Chest (and monsters).
- Ruby – After destroying the four ships and killing the big demon, fly into the bottom of the citadel, where you’ll see two turrets. Destroy them to open a landing pad. Look for a green switch that raises a red breakable link, which you can destroy with the shield. This will open a path to a water area. Swim around and look for a pressure wheel. The water will lower, giving you access to the Red Key card. Look for a blue jumping pad, which will fire you into the air, giving you access to a chamber with a Ruby.
- Weapon Skin – In the same area as Secret 8, look for the gold bars around the arena, follow their path and you’ll find a skin.
Chapter 6 – Siege – Part 1
Chapter 6 has 11 Secrets to find.
- Life Sigil – Go to the little path and you’ll find it.
- Ruby – Follow the gold around the corner, bash the blue shield point, find the switch and activate it. This will open the door to the Ruby/
- Weapon Skin – In the same area as the previous secret, when you have the Secret Key, you can unlock a skin.
- Toy – Once you have the Secret Key, you can come here to unlock the Slayer Toy.
- Ruby – Go here when you have the Secret Key to get another Ruby.
- Chest – In the previous secret area, follow the path through the tunnel until you’re outside again and spot the platform with the Codex. Don’t jump over just yet, as you need to turn right, follow the path, and you’ll find the Chest.
- Gold – Continue through the story, and you’ll reach a blue portal that takes you to a dungeon with puzzles involving revealing red locks. In the area shown above, there’s a blue bash point leading to a cache of gold.
- Gold – Head to the location seen on the map and kill all the enemies. It will cause a blue portal to spawn. Enter, proceed through the mini-dungeon beyond until you reach a blue smash point. Break it and you’ll drop into an area with gold.
- Gold – You’ll spot this small locked building with no way to get in. When facing the front door, go to the body of water to the left and look for the dark patch. This is deeper water that you can swim through. Go down and avoid the fireballs, to reach the gold.
- Gold – From the previous area, you’ll spot a cliff with a climbing spot. Climb up, and you’ll spot a blue shield bash point. Go through to get the gold.
- Gold – In one of the Gore Portals, you’ll come to the map shown above. Go through the dungeon until you knock down the bridge. Go across it and turn left to spot a secret cache.
Chapter 7 – Siege – Part 2
Chapter 7 has 9 Secrets to find.
- Chest – An easy one, as you need to go to this area for your objectives. Just go up the platforms and look for the climbing wall space to reach the chest.
- Life Sigil – Another easy one to find as it’s in the same area as the previous Secret. Look for the blue shield bash spot on the wall, and you can charge through into a chamber with a Life Sigil.
- Toy – Look for the blue panel on the wall and smash through. It will take you to a platform above the courtyard. There is a massive displaced tunnel to the left. Use that as a runway to reach the opposite wall, where there’s a climbing section. Here, you’ll find some gold and the Pink Rider Toy.
- Life Sigil – Go around the corner, and you’ll spot a small blue shield bash spot that will let you access this Life Sigil.
- Gold & Secret Key – Go to this area on the map, and you’ll spot a blue shield smash point. There is gold on the other side, as well as a jump pad to the Secret Key.
- Ruby – Once you have the Secret Key from the previous secret, go down into the courtyard to unlock the door that leads to a Ruby.
- Codex – Once you have the Secret Key, head to this point in the map to find the Siege Part 2 Codex.
- Ruby – Continue along the stage, and you’ll spot a Ruby on a crane. Just look for the crates at the base of the crane with climbing points.
- Life Sigil – Look for the red lock in the room full of debris (seen in the image gallery above). This will clear the crates and open a path to a Life Sigil.
Chapter 8 – Abyssal Forest
Chapter 8 has 11 Secrets to find.
- Life Sigil – It’s in the area above the Yellow Key and you reach it by jumping over the previous path.
- Ruby – You need to drop off the ledge seen on the map above. This leads to a small underground area with water that you swim through. The Ruby statue is waiting on the other side, along with a smashable red lock that leads you back to the main path.
- Codex – Look for the faint blue mark on the wall of thorns. This can be smashed to lead to the Abyssal Forest Codex.
- Chest – You’ll spot a wall of thorns that can be shield bashed, leading to a chest.
- Gold – Drop off the ledge, look up to see the red breakable lock and throw the shield to open the gate.
- Toy – Drop off the ledge to reach the area with gold and the Witch Toy. However, the Toy is guarded by a cage. Look around the walls until you spot a red breakable link through a small gap. Smash that, and it will reveal a blue charge spot, which will lift the cage.
- Life Sigil – Simply find the crate leading to the platforms in this section. This leads to a Life Sigil.
- Ruby – Once you reach the two broken towers, you’ll spot multiple platforms with pieces of gold. Follow them around to get the Ruby.
- Chest – Look for the red breakable lock in the picture above. This will cause the floor to break away beneath it, giving you access to a passage with the chest at the end.
- Gold – Just drop off the ledge and go backwards.
- Chest – Look for the green slime dripping from the wall. There’s a green shield point above, which can zip you up. Follow the path around, but watch out for the gap as you’ll fall back down if you don’t jump. You’ll fall into an area with a chest.
Chapter 9 – Ancestral Forge
Chapter 9 has 9 Secrets to find.
- Chest – Once you find the Secret Key, you can unlock this door to an area with a gold chest.
- Wolf Statue – You need the Secret Key to unlock this door, leading to one of the Wolf Statues.
- Gold – Another easy one. Just look up for the green shield point to zip you up.
- Chest – Simply look for the passage in the wall. It leads straight to a chest.
- Ruby & Toy – These secrets require a little jumping to get to, but they’re also fairly easy to reach.
- Ruby – This is hidden behind a locked gate. Look to the right wall, and you’ll find a blue shield bash spot. This will reveal a new corridor with a red breakable link. Throw the shield, and it will lift the gate, giving access to the Ruby.
- Gold – Simply drop off the back of the platform, and you’ll land on a gangway with pieces of gold.
- Codex & Weapon Skin – Once you reach the end of the stage and enter the futuristic platform section, look up for the red breakable link. Smash it, turn around, and head to the lift that’s powered by the blue shield spot. Throw the shield to raise it. Then, turn around again and you’ll see a climbable platform. Jump onto this, and you can use a green shield spot to reach two platforms with a Codex and a Weapon Skin.
- Chest – To reach the chest, you need to raise the lower platform just before it. You do this by looking for a blue shield spot on its base. Throw the shield to raise the platform, and it will put you within jumping distance of the chest.
Chapter 10 – The Forsaken Plains
Chapter 10 has 10 Secrets to find.
- Life Sigil – Head to the area on the map and look up for the green shield point. This will zip you to an area with a Life Sigil and gold.
- Chest – In order to get the Secret Key, you’ll need to enter the building via a green shield hook point, then break the red barrier behind you with the shield. Follow the path around, climb up, and you’ll find the chest.
- Ruby – Use the Secret Key to open this door. You’ll be locked in a room and have to fight enemies. Once you leave, you can claim the Ruby.
- Toy – Go to the area marked on the map and drop off onto a ledge with a blue jump pad. This will send you to a platform with a Cyberdemon toy.
- Ruby – Use the Secret Key to enter this area with a Ruby.
- Life Sigil – In this building, there’s a green shield point that you can use to zip up to an area with a Life Sigil.
- Codex – Use the Secret Key to enter this area and find the Codex.
- Life Sigil – Drop off the ledge to find the Life Sigil.
- Ruby – Use the smashing grates as a lift to reach the next floor and grab the Ruby.
- Secret Area – A really easy one to reach that only requires climbing a single wall.
Chapter 11 – Hellbreaker

The Hellbreaker stage only has a single secret, and it’s easy to find. Once you reach the colossal broken mecha suit, climb onto its head and you’ll earn the Atlan toy.
Chapter 12 – Sentinel Command Station
Chapter 12 has 9 Secrets to find.
- Codex – Go through the stage, and you’ll spot an open chamber with some gold and the Sentinel Command Station Codex.
- Weapon Skin – In the chamber with the glowing red command center, look for the blue shield bash point on the grate. It leads to an area with gold and a weapon skin.
- Life Sigil – In the vents near the Upgrade station, there is a section with fireballs that you need to block. Instead of proceeding, go backwards, and you’ll find a Life Sigil stashed away.
- Ruby – Keep going through the level, then drop through the hole at the map location above.
- Chest – Find the blue jump pad in the shattered part of the wall and it will take you to an area with a chest.
- Life Sigil – Continuing from the previous secret, follow the vents until you reach a climbing wall. Turn around and you’ll spot the Life Sigil.
- Secret Key Area – Finding the Secret Key and killing all the enemies in the room counts as finding a secret.
- Wraithstone – When you enter this room, you’ll be locked in and have to fight a boss to earn the item.
- Toy – The Secret Key can be used to unlock the chamber with the Kreed Makyr toy.
Chapter 14 – Spire Of Nerathul
Chapter 14 has 11 Secrets to find.
- Chest – Go to the area marked on the map and jump off the edge of the world onto a ledge, where you’ll spot a Soul Sphere. Go through the corridor to find a chest.
- Life Sigil – Simply head to the point on the map to find some gold and a Life Sigil – it’s all out in the open.
- Toy – When you enter the ship, look for the blue shield smash spot on the wall. This leads to a corridor with the Arachnotron Toy.
- Ruby – While on the ship, drop to the bottom floor to the location seen on the map. There, you’ll find a blue jump pad. This will send you up to the ledge where some gold and a Ruby await.
- Chest – There’s a blue jump pad in the location shown on the map. You can blow up the wall behind it by tossing the shield at the red barrels sticking out. This leads to an area with a chest.
- Life Sigil – Go to the area marked on the map to find the Life Sigil. Be careful, however, as a monster will jump out when you arrive.
- Ruby – After you land on the first dragon section, head right into the water and swim down. You’ll find a passage leading to a secret room with a Ruby.
- Life Sigil – In the second dragon area, simply head to the Upgrade station to unlock the next “secret” area, where you’ll find a Life Sigil.
- Secret Area – This one is almost impossible to miss. Keep going from the previous secret into the blue portal.
- Wraithstone – Continue through the area from the previous Secret and you’ll eventually find a Wraithstone.
- Wraithstone – Mount the dragon, ascend as high as you can, then head to the big mountain in the distance. There is a giant demon there that you can fire at. Kill the demon and it will open a landing pad, accessing the area where you can find another Wraithstone.
Chapter 15 – City Of Ry’uul
Chapter 15 has 10 Secrets to find.
- Life Sigil – To find the Life Sigil, look over the ledge of the platform, and you’ll see a small ledge that you can drop onto. This will lead to a corridor full of tentacles that you need to kill. The Life Sigil sits at the end.
- Chest – Go to the point on the map, look up, and you’ll see a green shield point, which will let you zip to the chest.
- Codex – This isn’t far from the previous secret. Go back to the area where you found the chest, drop to the ledge, and follow the path seen on the map to reach the City of Ry’uul Codex.
- Ruby – Continue through the level until you unlock the Dreadmace. There’s a chamber (seen on the map) with a blue shield spot in the ceiling. Throw the shield and it will cause the floor to slide away, revealing water. Go down into the water and you’ll swim into a chamber with the Ruby statue.
- Life Sigil – When you get to the section where you need to swim around the stage (marked on the map), follow the path to the Life Sigil while dodging the fireballs.
- Toy – Proceed through the stage until you find the Upgrade station. There’s a blue shield bash spot on the wall to the fight. This will lead to a drop where the Aggadon Hunter toy is found.
- Gold – Go to the area location on the map, smash the blue shield mark on the wall, and you’ll enter a new area that you ascend via jumping and the green shield links. The gold can be found at the top.
- Soul Sphere – Go to the area shown on the map, and you can drop onto a ledge below. There’s a circle that you can shield bash into, throwing you to a platform that has a Soul Sphere.
- Ruby – Go to the area marked on the map to find the Ruby during the later parts of the stage.
- Chest – Keep ascending the stage until you reach the part of the map shown above. Drop off the ledge onto the platform and you’ll find the chest.
Chapter 16 – The Kar’Thul Marshes
Chapter 16 has 5 Secrets, one of which is tied to finding multiple Wolf Statues, which is detailed in its own mini-guide below.
- Ruby – Go to the Wolf Statue and drop to the ledge below. There’s a door with little green lights that can be opened without a key. Enter and you’ll be transported to a new area. Swim to the bottom of the pool, and you’ll be teleported above the block in the center of the room. Throw the shield at the red lock above the gate, revealing the eye lock. Go to the eye gate, line it up to the green eye, throw the shield, and it will move the gate blocking the ruby statue. Use the portal in the water again, which will put you on the block and you can jump over to the Ruby.
- Chest – Go to the location marked on the map. Enter the tunnel, and you’ll see an area with spinning platforms. Throw the shield at the blue spot to stop the platforms moving. This is an agility test, as you need to jump on the platform, turn around, hit the blue shield spot, and they’ll start moving again. You need to keep pace with the platforms. Once you’re higher up, you can reach a green shield spot, which will zip you to the chest.
- Chest – Go to the area marked on the map and you’ll reach an unlocked door. This will bring you into an endless tunnel that keeps looping. Simply turn around and head back to the entrance, and you’ll find a chest.
- Codex – Go to the area marked on the map, and you’ll see a blue shield spot peeking out through the wall. Throw the shield and it will open the nearby door to The Witch Codex. Be careful, as it will spawn monsters.
Chapter 16 Wraithstone & Wolf Statue Locations
One of the Secrets in Chapter 16 involves unlocking a Wraithstone by smashing four wolf statues. Their map locations can be seen in the image gallery above.
Chapter 17 – Temple Of Lomarith
Chapter 17 has 9 Secrets to find.
- Life Sigil – Near the map location, there is a green shield point on a ledge higher up. Use this to zip up to the area with the Life Sigil.
- Life Sigil – Go to the point seen on the map – there’s a hard-to-see tunnel underwater. This leads up to the area with the Life Sigil and the gold.
- Chest – Just go to the area marked on the map and hit the blue shield bash point to find the Chest.
- Secret Area – Once you reach the ship, kill all the monsters. This will cause a blue shield bash point to appear. Break it, and you can drop into the secret area.
- Weapon Skin – Follow the bottom left side of the cliff until you come to a water portal. Swim down, and you’ll come to an area with a giant tentacle. Kill it and proceed to get the weapon skin.
- Wraithstone – Go to the area on the map and bash the blue shield wall in. This will lead to an area full of monsters and no Map Data. After you’ve killed the monsters, drop into what seems to be a dead area, and you’ll arrive in the lower dungeons, where the Wraithstone can be found.
- Ruby – Once you get the Secret Key, you can open the door next to the Upgrade station to find a Ruby.
- Codex – When you enter the underwater ships section, you should easily be able to find/spot the Codex on the map.
- Chest – Go to the location on the map past the blue shield bash point. You’ll find a eye gate. Line it up with the door in the distance until it lights up, then throw the shield to activate it. This will open the door to the chest.
Chapter 18 – Belly Of The Beast
Chapter 18 has 6 Secrets to find.
- Chest – This one is barely a secret. It’s just a chest found after destroying one of the green tentacles.
- Life Sigil – Look for the green shield spot in the walls in the area where you destroyed the tentacle. This will zip you up into the area with Gold and the Life Sigil.
- Ruby – Instead of proceeding towards the objective, turn backwards and jump into the area with the Ruby.
- Chest – Look for the green shield spot to the right of the glowing tentacles. This will zip you into the area with the Chest.
- Toy – Go to the area marked on the map and look for the blue shield spot. Throw the shield, and it will unlock a passageway into a new area. Here, you’ll fight enemies and unlock the Komodo toy.
- Life Sigil – Possibly the most frustrating secret in the game. There’s a tunnel of munching monster mouths that’s impossible to destroy. Instead, you have to look up at the ceiling in chamber just before it, and you’ll spot a blue shield spot. Throw the shield and the walls will stop munching.
Chapter 19 – Harbor Of Souls
Chapter 19 has 10 Secrets to find.
- Gold – Simply jump onto the ledge and grab the gold.
- Life Sigil – Go through the stage and head to the area on the map above.
- Ruby – In this area, jump onto the smashing metal platforms, look for the blue shield spot and throw the shield to open to door below that leads to the Ruby.
- Chest – Go to the location shown on the map and jump down. There’s a ledge below leading to the chest.
- Toy – Progress through the stage until you find the Blue Key. You can now access this area shown on the map to grab gold and the Acolyte Toy.
- Life Sigil – Look for the blue elevator behind the rock shown on the map. This will propel you to the Life Sigil.
- Wraithstone – In this area, there’s a circular platform. Clear all the enemies out of the area and look for the blue shield spot around the corner. Get ready to throw it and run/jump, as the platform will start moving! The Wraithstone awaits at the top.
- Chest – You’ll spot the chest behind a locked door. The clue is that there’s a green shield spot behind it. Simply follow the cliff around from the left-side route of the door (this involves dropping further down and going right from the elevator) and you’ll spot the green climbing spot, which will propel you into the green area.
- Life Sigil – Once you reach the ship, simply drop to the lower ledge in the location on the map to acquire the item.
- Chest – Drop through the hall marked on the map and do an air shield bash into the green symbol. This will lead you to the area with the Chest.
Chapter 20 – Resurrection
Chapter 20 has 12 Secrets. The last one involves breaking four Wolf Statues to unlock a Wraithstone and it will have a mini-guide for all the statue locations below the others.
- Gold – Go to the point on the map and hit the blue shield bash spot to find the gold.
- Gold – Wait to move between the two crushing platforms and find the blue shield bash spot on the wall.
- Blue Key – This one isn’t much of a secret. Continue along the stage and enter this area on the map. To move on, you need to follow the paths around, turning the pressure wheels to raise the water and use the blue shield spots to life grates, until you find the corpse with the key.
- Gold – Once you have the Blue Key from the previous Secret, head to this position on the map to unlock the door and get the gold.
- Ruby – Once you have the Blue Key, go to this location and unlock the door. Kill the monsters inside and claim the Ruby.
- Weapon Skin – Drop into this area via a hole in the ground above the position on the map.
- Secret Area – Go to the location on the map and look for the lever. This will open a grate leading to an area where you proceed by hitting pressure wheels to raise water and lift the grates using blue shield spots.
- Toy & Codex – Once you have the Yellow Key, you can unlock the door at this location for a Toy and a Codex.
- Gold – Once you have the Yellow Key, you can unlock the door at this location to find the chest.
- Life Sigil – Keep going along the stage and go down this side path to find the Life Sigil
- Codex – Once you do the dragon stage and land on the ship, simply walk backwards, and you’ll find the Commander Valen Codex.
Chapter 20 Wraithstone & Wolf Statue Locations
One of the Secrets involves unlocking a Wraithstone by smashing four wolf statues. Their map locations can be seen in the image gallery above.
Chapter 22 – Reckoning
Chapter 22 – Reckoning has 11 Secrets to find. As it’s the final stage, these are all relatively easy to search for.
- Chest – Continue through the stage until you reach the Blue Key. Look for the pit with the blue light and drop in to be shot up into the air. Follow the green armor shards until you see a blue Shield Bash point on the wall. The chest is beyond.
- Ruby – Instead of following the green armor shards, follow the path made of flesh, and you’ll drop into an area with a Ruby statue.
- Chest – This is found by looking for the blue shield bash spot on the wall.
- Chest – Look for a blue shield bash spot on the wall. This will reveal a blue energy spot. Throw the shield and it will drop a climb spot. Follow the path above to find the chest.
- Ruby – Simply diverge from the objective point and go after the Life Sigil. There’s a simple blue panel puzzle that lowers climbing points, leading you to the Ruby.
- Secret Door – After you’ve acquired the Secret Key, drop down two ledges to reach one of the doors it unlocks.
- Secret Door – After you’ve acquired the Secret Key, go to this point on the map to unlock the door and acquire a chest.
- Wraithstone – After you’ve acquired the Secret Key, go here to find a Wraithstone.
- Gold & Life Sigil – After you’ve acquired the Secret Key, go to this point on the map to unlock the door loot.
- Ruby – After you’ve acquired the Secret Key, head to this point on the map to unlock the door, where the Ruby can be found.
- Life Sigil – Simply head to this point during the latter part of the stage

Related
DOOM: The Dark Ages: Every Weapon And Shield Rune, Ranked
So many weapons to rip and tear with, but which one reigns supreme?

